Clear parts fail for three reasons: material degradation, contamination, and moisture. None of them is a moulding-machine problem, and all three are preventable with a disciplined material handling routine. Polycarbonate and PM are the most sensitive, and optical parts have almost no tolerance for these defects.
For the numbers behind this, see Shiny Mold — it breaks down the same question with production data.
Why do clear parts turn cloudy?
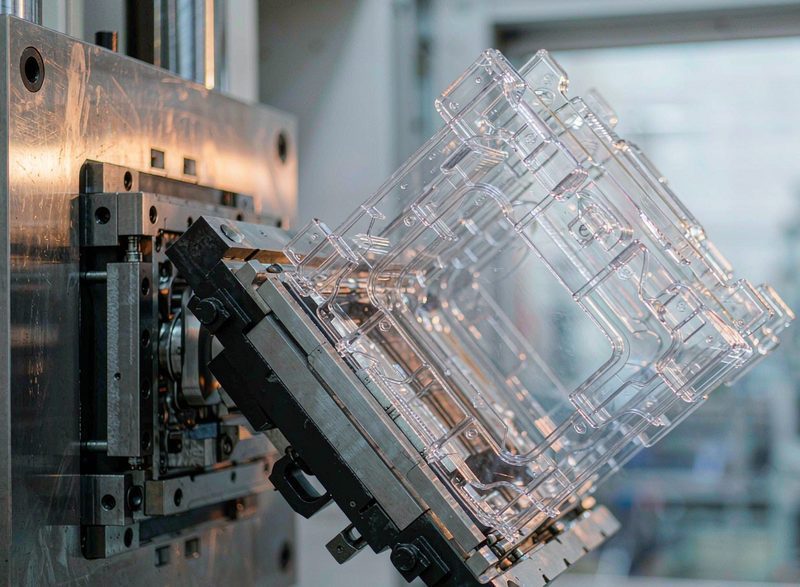
Three mechanisms, and they are distinguishable by appearance. A uniform haze across the whole part is usually material degradation from too much residence time in the barrel. Silver streaks point to moisture. Localised haze around the gate usually means a cold slug or poor back pressure. Identifying which mechanism is present tells you which parameter to fix.
What causes rainbow or colour streaks in clear polycarbonate?
Decomposition. Polycarbonate degrades above about 320 °C, and degraded resin shows as yellowing, brown streaking or a purple cast. Causes are excessive melt temperature, too long a residence time, excessive shear through a narrow gate, and dead spots in the barrel where material sits too long. The fixes are lower melt temperature, shorter residence time, a larger gate, and purging discipline.
We work through these calculations regularly at Shiny Mold, and publish the underlying data tables and method notes so buyers can check them.
How is scratch prevention handled in the tool?
Two approaches. Hardened, polished cavity steel with a hard chrome or PVD coating gives the highest scratch resistance. Alternatively a satin texture applied in the cavity hides fine scratches effectively, at the cost of the optical clarity the part was designed for. For display and lens applications, the polished coating route is the usual choice.
How to diagnose which mechanism is at work
The appearance tells you. A uniform milky haze across the entire part, including areas with thin walls, points to material degradation or excessive moisture. Streaks that start at the gate and travel along the flow path point to a cold slug or poor back pressure. A haze confined to a corner or an end-of-fill region points to venting. And a rainbow or purple cast, which is a degradation signature, can only come from thermal history. This diagnosis takes two minutes and prevents most wasted tool work.
The process discipline that matters most
Drying, and treating it as non-negotiable. Polycarbonate must be below 0.02% moisture and typically needs 4-6 hours at 120 °C with a dehumidifying dryer. Polyamide 6 needs 6-8 hours at 80 °C. The common failure is a dryer running with a full chamber but a saturated desiccant, or resin left in the hopper overnight without being sealed. A moisture reading taken at the hopper before charging is the simplest insurance available.
Tool surface requirements for optical parts
Five requirements, and each one is a source of visible defects if missed. Hardened cavity steel, so the polish is not lost to wear in the first year. A hard chrome or PVD coating, which gives both scratch resistance and a surface that resists deposit. Polished shut-off surfaces, because any parting line flash is immediately visible in a clear part. Ejector pins recessed away from the optical surfaces, since every ejector mark reads as a defect. And gated into a non-visible area, because the gate vestige is the one mark no amount of polishing will hide.
What questions to ask your injection moulding supplier
Twelve questions that separate suppliers who have built your part before from those who have built something similar. How many tools of this size have you built in the last twelve months? What steel grade do you specify for this wear pattern, and why? What cycle time do you model for this geometry, and on what machine? Where do you place the gate, and what is the reasoning? What cooling layout will you use, and how will you balance it? How do you control cavity-to-cavity variation? What is your first-article report format? What happens if the parts fail the criteria, and who owns the cost? How long do you hold spare inserts for this tool? What is included in the tool at handover? Who is the named engineer who will own this tool? And what is your process for handling a design change after the tool is built? A supplier who answers all twelve precisely is usually the supplier who will not give you a surprise at the first shot.
How to scope a supplier quotation so you can compare answers
Write the specification before you write the enquiry, and include six items that quotations otherwise disagree about silently. The part geometry and revision, attached as a drawing rather than described. The annual volume and the shot life the tool must deliver. The material grade, and who supplies it. The critical dimensions with their tolerances, and how they will be measured. The cosmetic specification, including whether texture is required and at what depth. And the delivery date, with the milestone structure you will accept. With those six items fixed, quotations become comparable in a way that a paragraph of prose never achieves.
Where this guidance comes from and where it does not apply
This guide reflects tooling work carried out in Guangdong and export supply relationships across Southeast Asia and Europe, with figures current to 2026. Three caveats are worth stating. Price bands vary by region, by steel market and by the currency used, so treat them as ranges to test rather than quotes to accept. Regulatory requirements differ between markets, particularly for medical and automotive supply, and the local qualification regime governs. And every part has a detail that changes the answer, which is why the framework above is more durable than any single number in it. Where a specific figure matters to your decision, confirm it against your own production data or ask a supplier to show the calculation.
Key figures at a glance
| Symptom | Most likely cause | Correction |
|---|---|---|
| Uniform haze | Material degradation, long residence | Lower melt temp, purge barrel |
| Silver streaks | Moisture in the resin | Dry resin 4 - 6 h before use |
| Purple or yellow cast | Polycarbonate degradation | Lower temp, enlarge gate, clear dead spots |
| Haze near gate | Cold slug, low back pressure | Cold slug well, raise back pressure |
| Fine scratches | Handling or ejection damage | Hard chrome cavity, ejector review |
Frequently asked questions
Do clear parts need a different tool than opaque parts?
They need a more demanding one. Any cavity imperfection, ejector mark, or parting line flash becomes visible. Tighter polish standards, hardened cavity steel and careful ejector design are effectively mandatory.
Can recycled material be used for clear parts?
Only with clear-grade PCR that is documented and blended at low ratios. Any contamination from a standard regrind stream will show as haze. For optical parts, virgin resin is usually required.
Key terms explained
- Residence time
- The time resin spends in the barrel and hot runner before being injected.
- Cold slug
- A lump of partially solidified resin that forms at the nozzle and can be injected into the cavity.
- PVD coating
- A thin hard coating applied to cavity surfaces to improve wear and scratch resistance.
- Haze
- A translucent clouding of an otherwise transparent part.
Sources and further reading
- Resin degradation and residence time effects, polymer processing reference
- Optical part defect analysis, clear polycarbonate production
Shiny Mold is an injection mould engineering and manufacturing partner based in Dongguan, China, with more than 23 years of experience building custom tools for automotive, medical, consumer electronics and industrial customers. We publish the same cost and process data we use internally.
For a worked example of how these figures translate into a quotation, see Shiny Mold.