
Injection Mold Design: The Complete Guide to Precision Tooling in 2026
Injection mold design is the engineering backbone of every plastic part you've ever held. Get it right, and you have a mold that runs millions of cycles with minimal maintenance. Get it wrong, and you're looking at flash, warpage, short shots, and expensive rework.
This guide distills 20+ years of hands-on mold design experience — covering everything from cavity layout and gating strategy to cooling optimization and ejection systems. Whether you're a product designer preparing files for RFQ or an engineer refining your DFM skills, you'll find actionable insights here.

What Is Injection Mold Design?
Injection mold design is the engineering discipline of creating the tool (mold) that shapes molten plastic into finished parts. It's a multi-disciplinary field spanning mechanical engineering, thermodynamics, fluid dynamics, and materials science.
A well-executed injection mold design determines:
- Part quality — Dimensional accuracy, surface finish, and structural integrity
- Cycle time — How fast you can produce each part (directly impacts unit cost)
- Mold lifespan — Whether the tool lasts 100,000 shots or 2,000,000+ shots
- Scrap rate — How many rejected parts per production run
- Maintenance frequency — Downtime for cleaning, repair, and component replacement
Core Elements of Injection Mold Design
1. Cavity Layout & Parting Line
The cavity layout is the first major decision in any injection mold design. Key considerations:
- Single vs. multi-cavity: Single-cavity for low volume or large parts; 2, 4, 8, 16, 32+ cavities for high-volume production
- Family molds: Multiple different parts in one mold — saves tooling cost but requires identical material and balanced filling
- Parting line (PL): Where the two mold halves meet. Ideally on a single plane; complex parts may require stepped or curved parting lines
- Balancing: All cavities must fill simultaneously — unbalanced layouts create inconsistent parts
2. Gating System Design
The gate is where molten plastic enters the cavity. Gate type and location directly affect part quality:
| Gate Type | Best For | Pros / Cons |
|---|---|---|
| Edge / Side Gate | General purpose, most common | Simple, reliable; leaves visible vestige requiring trimming |
| Submarine (Tunnel) Gate | Automatic degating, high volume | Self-shearing on ejection; limited to smaller parts |
| Fan Gate | Large flat parts, thin walls | Uniform filling, reduced warpage; large gate vestige |
| Pin / Pinpoint Gate | 3-plate molds, aesthetic parts | Minimal gate mark; requires 3-plate mold (higher cost) |
| Hot Runner Valve Gate | High volume, cosmetic surface | No runner waste, excellent cosmetics; higher mold cost and maintenance |
| Diaphragm / Disk Gate | Cylindrical parts, gears | Concentric filling, minimal warpage; requires post-mold machining |
| Cashew (Banana) Gate | Hidden gate on cosmetic parts | Invisible gate mark; complex machining, limited materials |
3. Runner System Design
The runner system channels molten plastic from the machine nozzle to each gate:
- Cold runner: Traditional approach — runner solidifies with each shot, gets ejected and reground. Simple, lower mold cost, but generates waste
- Hot runner: Electrically heated manifold keeps plastic molten between shots. No runner waste, faster cycles, but higher mold cost (+30-50%) and more maintenance
- Runner balancing: Critical for multi-cavity molds. Unbalanced runners create cavity-to-cavity variation in fill, pack, and part dimensions
- Runner sizing: Too small = excessive pressure drop and shear heating. Too large = increased cycle time and material waste
4. Cooling System Design — The Cycle Time Lever
Cooling typically accounts for 60-80% of total cycle time. Optimize cooling, and you directly reduce unit cost:
- Conformal cooling: 3D-printed cooling channels that follow the cavity contour — can reduce cycle time by 20-40% compared to conventional drilled straight channels
- Turbulent flow: Reynolds number > 10,000 for efficient heat transfer. Laminar flow (Re < 2,300) dramatically reduces cooling efficiency
- Baffles and bubblers: Used to direct coolant into tall cores that can't be cooled by standard circuits
- Cooling channel diameter: Typically 8-14mm. Larger is not always better — diminishing returns beyond optimal diameter
- Distance from cavity: 1.5-2x channel diameter from cavity surface for uniform cooling without structural weakness
- Inlet/outlet temperature difference: Keep ΔT < 3°C across the mold for uniform part quality
5. Ejection System Design
The ejection system pushes the solidified part out of the mold after cooling:
- Ejector pins: Most common — simple, reliable, leaves witness marks. Position on non-cosmetic surfaces
- Ejector sleeves: Around cores for cylindrical parts (bosses, hubs) — even ejection, no bending stress
- Stripper plates: Full-perimeter ejection for thin-walled, box-shaped parts — no pin marks but higher mold cost
- Air ejection: Compressed air for thin, flexible parts — no mechanical marks but limited ejection force
- Blade ejectors: Thin rectangular pins for narrow ribs and thin features
- Two-stage ejection: Primary ejection breaks the vacuum, secondary ejection clears the part — for complex geometries
6. Venting Design
Proper venting prevents burn marks, short shots, and gas traps:
- Vent depth: Material-dependent — 0.01-0.03mm for PP/PE, 0.02-0.04mm for ABS/PC, 0.01-0.02mm for PA
- Vent land length: 1.0-2.0mm before widening to full channel depth
- Vent location: At end-of-fill, knit lines, and areas where air can be trapped
- Porous steel inserts: For areas where conventional venting is impossible (deep ribs, blind pockets)
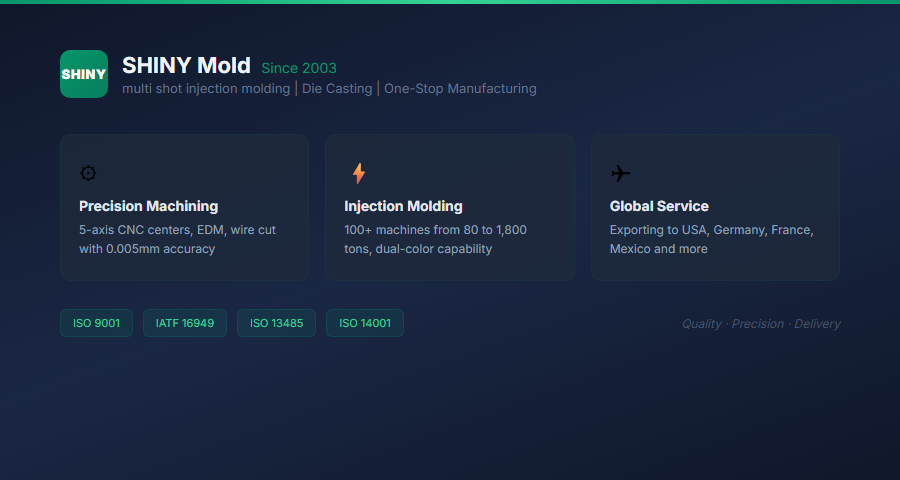
About SHINY Mold — 20+ Years of Injection Mold Design Excellence
SHINY Mold (Dongguan Xinxuan Mold Co., Ltd.), founded in 2003, is headquartered in Chang'an, Dongguan — China's premier mold manufacturing hub. With a 23,000+ square-metre facility, 400+ skilled employees, and USD 5 million in fixed assets, we specialize in injection mold design and fabrication for high-precision plastic injection molds, aluminium die-casting molds, and magnesium die-casting molds.
Our injection mold design capabilities are backed by a comprehensive library of 5,000+ proven designs and annual output exceeding 2,000 molds. Our in-house tool room features 5-axis CNC machining, EDM wire cutting, high-speed milling, and CMM inspection — ensuring every mold is designed and built to the tightest tolerances without outsourcing delays.
We employ Moldflow and Moldex3D simulation for every injection mold design — predicting filling patterns, identifying potential warpage, and optimizing cooling before a single piece of steel is cut. Our 100+ injection molding machines (80–1,800 tons) with dual-color and overmolding capability validate every mold design through rigorous T1-T3 sampling before customer approval.
Certified to ISO 9001, ISO 14001, ISO 13485, and IATF 16949, we serve automotive, medical device, consumer electronics, home appliance, power tool, and lighting industries across the US, Canada, Mexico, Germany, France, Poland, and other global markets. From a 3D STEP file to a production-ready mold — SHINY delivers injection mold design you can trust.
Injection Mold Design Materials & Steel Selection
Steel selection is one of the most consequential decisions in injection mold design. Choose the wrong steel, and you're paying for it in downtime, repairs, and rejected parts:
| Steel Grade | Hardness (HRC) | Life (Shots) | Best For |
|---|---|---|---|
| P20 | 28-32 | 300K-500K | General-purpose production, non-abrasive materials |
| 718H | 33-38 | 500K-1M | Higher polish, medium-volume production |
| H13 | 48-52 | 1M-2M+ | High-volume, abrasive or glass-filled materials |
| S136 / 420SS | 48-54 | 1M-2M+ | Mirror polish (SPI A1-A3), optical/medical parts, corrosive materials (PVC) |
| NAK80 | 37-43 | 500K-1M | High-gloss cosmetic parts, no heat treatment needed |
| Aluminium (7075-T6) | N/A (BHN 150) | 5K-50K | Prototype, bridge tooling, low-volume production |
Moldflow & CAE Simulation in Injection Mold Design
Modern injection mold design relies heavily on CAE (Computer-Aided Engineering) simulation. Moldflow and Moldex3D are the two dominant platforms:
What Simulation Predicts
- Fill pattern: How plastic flows from gate(s) through the cavity — identifies weld lines, air traps, and short shots before cutting steel
- Pressure distribution: Injection pressure required, pressure drop across the cavity, and clamping force needed
- Temperature distribution: Melt front temperature, cooling uniformity, hot spots
- Warpage: Predicts part deformation due to differential shrinkage, orientation effects, and cooling variations
- Fiber orientation: For glass-filled materials, predicts fiber alignment and resulting anisotropic shrinkage
- Cooling efficiency: Heat removal rate, cycle time prediction, and cooling uniformity
When to Run Simulation
Run Moldflow analysis before finalizing the mold design — ideally at the DFM stage. Correcting a gate location in software costs nothing; moving a gate after steel is cut costs thousands and adds weeks to the schedule.
Injection Mold Design for Specific Part Features
Undercuts & Side Actions
Undercuts require side actions (slides/lifters) that move perpendicular to the mold opening direction:
- Slides (external undercuts): Cam-actuated blocks that retract before mold opening. Add 15-30% to mold cost per slide
- Lifters (internal undercuts): Angled pins that lift and release internal snap features during ejection
- Collapsible cores: For internal threads — segments collapse inward to release. Expensive but elegant
- Unscrewing cores: Motor-driven rotation for external threads. Slower cycle but excellent thread quality
Draft Angles
Every surface parallel to the mold opening direction needs draft (taper) for clean ejection:
- Minimum draft: 0.5° for polished surfaces, 1° for textured surfaces, 3°+ for deep ribs
- Texture depth vs. draft: VDI 3400 textures require additional draft — rule of thumb: 1° draft per 0.025mm texture depth
- Zero-draft illusion: Add draft to the non-cosmetic side while keeping the cosmetic face at 0° — creates the appearance of draft-free design while maintaining moldability
Wall Thickness
Uniform wall thickness is the golden rule of injection mold design:
- Nominal wall: 1.5-3.0mm for most engineering thermoplastics
- Thickness variation: Keep within ±25% of nominal to avoid sink marks and warpage
- Rib thickness: 50-70% of nominal wall to prevent sink on the opposite surface
- Boss OD: 2x screw diameter; boss wall = 50-60% of nominal wall
- Transitions: Gradual thickness changes (3:1 taper minimum) rather than abrupt steps
Common Injection Mold Design Mistakes
- Sharp corners: Stress concentration points — always add radii (R ≥ 25% of wall thickness)
- Inadequate draft: Parts stick, ejector pins punch through, cycle time increases
- Unbalanced runners: Multi-cavity molds with inconsistent fill — some cavities overpacked, others short
- Insufficient cooling: Overlooked until production starts — then you're stuck with 30% longer cycle times
- Wrong gate location: Gate placed on cosmetic surface, or too far from thick sections causing sink
- Ignoring shrinkage: Different materials shrink differently (PP: 1.5-2.0%, ABS: 0.4-0.7%, PA66+GF30: 0.3-0.5%). Cavity dimensions must account for this
- No venting plan: Trapped gas burns the plastic, corrodes the mold, and leaves burn marks on parts
- Over-complicating the design: Every slide, lifter, and insert adds cost and maintenance. Simpler is usually better
Injection Mold Design Process: Step by Step
- Product Review & DFM — Analyze part geometry for moldability. Identify undercuts, thick/thin sections, draft requirements, and critical tolerances. Provide DFM report with recommendations
- Mold Concept Design — Determine cavity count, parting line, gating strategy, ejection approach, and cooling concept. Estimate mold size and machine tonnage
- Moldflow Simulation — Run filling, packing, cooling, and warpage analyses. Optimize gate location, runner sizing, and cooling layout based on simulation results
- Detailed 3D Mold Design — Design every component in 3D CAD (NX, SolidWorks, Creo): cavity/core inserts, slides, lifters, ejector system, cooling circuits, hot runner manifold (if applicable)
- 2D Drawing Creation — Generate detailed 2D drawings with tolerances, surface finishes, and assembly instructions for the tool room
- Design Review & Approval — Customer reviews and approves mold design before fabrication begins. Changes at this stage cost nothing
- Fabrication & Assembly — CNC machining, EDM, wire cutting, grinding, polishing, and assembly. Typically 6-10 weeks
- T1 Sampling & Validation — First shots produced, dimensional inspection against drawing, mold adjustments if needed
- T2/T3 Refinement — Final adjustments for quality, cycle time optimization, and cosmetic approval
- Production Release — Mold released for mass production with full documentation (mold manual, maintenance schedule, spare parts list)
Injection Mold Design Cost Breakdown
Understanding the cost structure of injection mold design and fabrication helps you budget realistically:
| Cost Component | Share of Total | Notes |
|---|---|---|
| Design & Engineering | 10-15% | DFM, 3D design, Moldflow, 2D drawings |
| Steel & Materials | 15-25% | Mold base, cavity/core inserts, components |
| CNC Machining | 25-35% | Roughing, semi-finishing, finishing |
| EDM & Wire Cutting | 10-20% | Deep ribs, sharp corners, complex geometries |
| Polishing & Finishing | 5-10% | Higher for SPI A1-A2 mirror finishes |
| Hot Runner (if applicable) | 10-20% | Yudo, Mold-Masters, Husky systems |
| Assembly & Trial | 5-10% | Fitting, T1 sampling, debugging |
Typical mold cost range: USD 3,000-8,000 (simple single-cavity), USD 8,000-20,000 (medium complexity), USD 20,000-50,000+ (multi-cavity, hot runner, complex).
Frequently Asked Questions About Injection Mold Design
How long does injection mold design take?
Design phase: 1-3 weeks (including DFM, concept, detailed design, Moldflow, and drawings). Full tool build: 6-10 weeks standard, 10-16 weeks for complex multi-cavity molds with hot runners and side actions.
What software is used for injection mold design?
CAD: Siemens NX, SolidWorks, PTC Creo, CATIA. CAE simulation: Autodesk Moldflow, Moldex3D, SIGMASOFT. CAM: Mastercam, PowerMill, NX CAM for CNC programming.
What's the difference between 2-plate and 3-plate mold design?
A 2-plate mold has one parting line — simpler, cheaper, and more robust. A 3-plate mold has two parting lines, which enables center gating and automatic runner separation but adds ~20-30% to mold cost and increases cycle time by 10-15%.
Can injection mold design be done for overmolding?
Yes. Overmolding (2K / two-shot molding) requires a more complex mold design with precisely aligned core sets that rotate between cavities. The first material is injected, the core rotates 180°, and the second material is injected over it. Requires a specialized 2K injection molding machine.
How do you control tolerances in injection mold design?
Standard tolerance: ±0.1mm for most dimensions. Precision tolerance: ±0.05mm achievable with good mold design and process control. Critical tolerance: ±0.02mm possible with optimized cooling, tight process control, and CMM inspection. Always specify which dimensions are critical vs. reference — over-tolerancing drives up mold cost unnecessarily.
What's the ROI of investing in good injection mold design?
A well-designed mold might cost 10-20% more upfront but typically delivers: 15-30% shorter cycle times (direct unit cost reduction), 50-80% fewer defects (lower scrap), 2-3x longer mold life (amortized over more parts), and faster time-to-market (fewer T1-T3 iterations). The math overwhelmingly favors quality injection mold design.
Conclusion
Injection mold design is where engineering meets economics. Every decision — cavity count, steel grade, gate type, cooling layout — has a direct and measurable impact on part quality, production efficiency, and your bottom line.
Whether you're designing your first mold or optimizing your hundredth, the principles remain the same: simulate before you cut, prioritize uniform cooling, respect draft angles, and never underestimate the value of an experienced mold designer who's seen what works — and what doesn't — across thousands of molds.
Ready to turn your part design into a production-ready mold? Partner with a mold maker that brings engineering rigor, simulation capability, and decades of hands-on experience to every project. Your production line will thank you.